JDV 4.06 Vertical expansion joint for wall, ceiling and facade
JDV 4.06
Wall, ceiling and facade expansion joint
Product compatible with our fire protection solutions and our waterproofing membranes

Environment
Movement
aluminium
nitrile
black
grey
RAL colours
flat and angle
CHARACTERISTICS :
Wall expansion joint available from stock
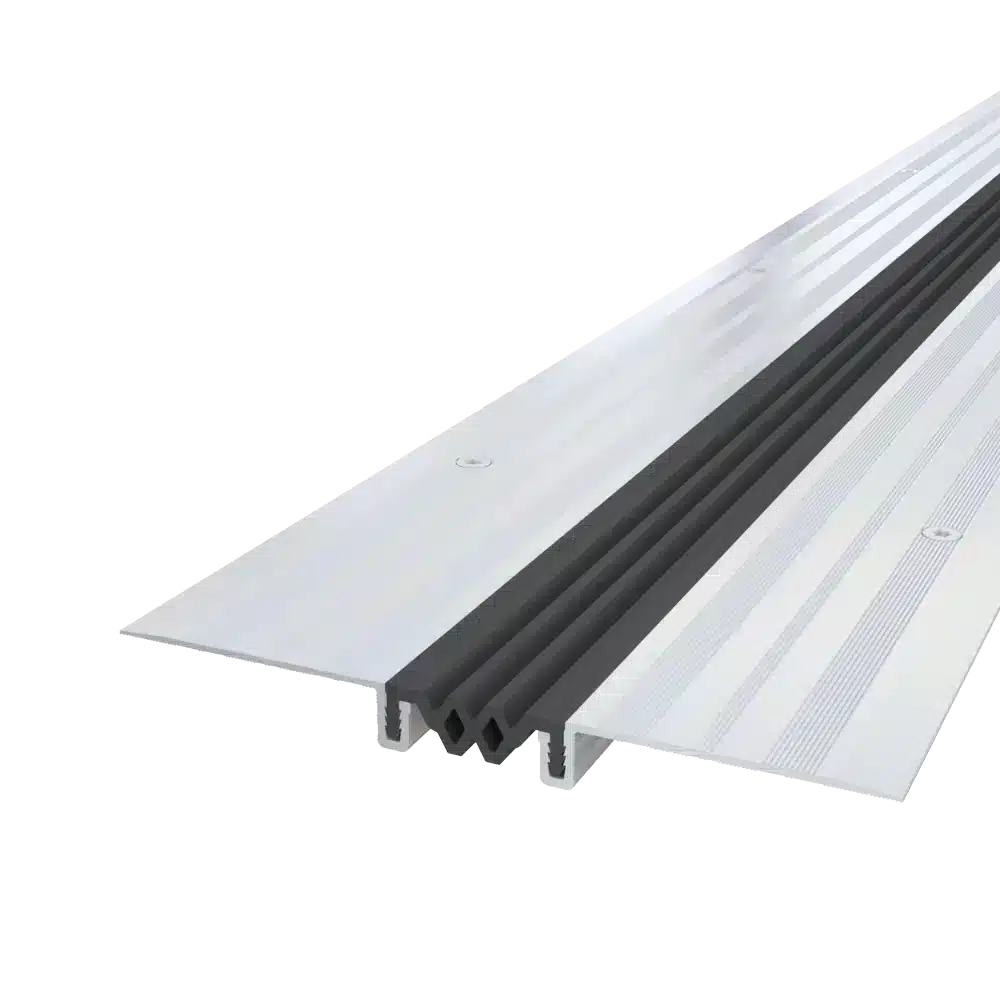
JDV 4.06 is an aluminum expansion joint for openings up to 60 mm. For larger openings, we can suggest you the JDV 4.065 wall and façade expansion joint. Technical data sheet are available on request.
Our ceiling, façade and wall expansion joint JDV 4.06 is mechanically fastened using VBU 4.5×50 mm stainless steel screws and 8×40 mm nylon plugs. Each 3lm length requires 14 screws. We supply with the side plates a heat-weldable grey or black ribbed insert. For other insert colors, please consult us. A smooth insert is available for the 50 mm opening. Please note, however, that expansion and contraction movements are reduced. This wall, facade and ceiling expansion joint is available in flat or corner versions. Depending on your needs, the angles can be visible or invisible for a more aesthetic finish.
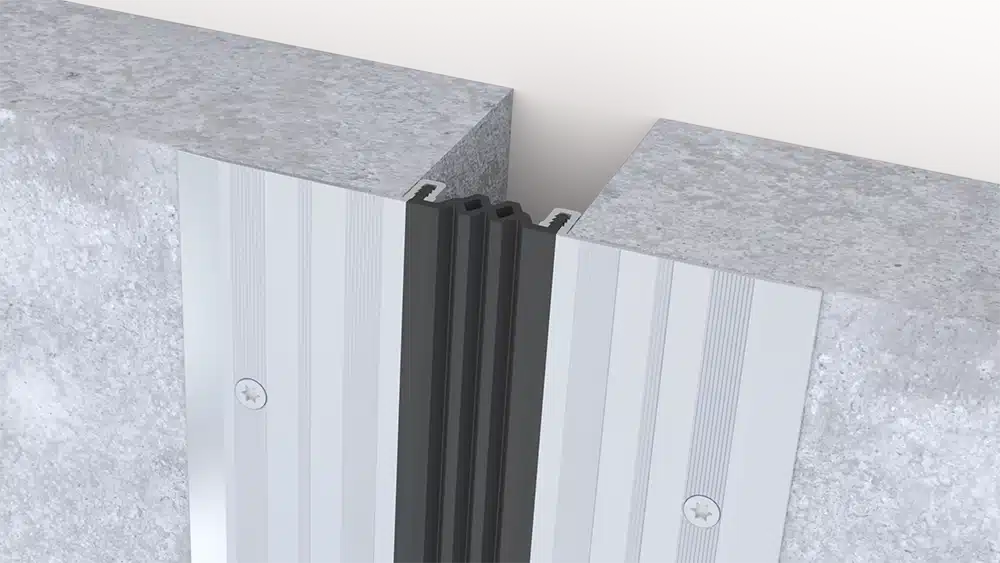
How to install a wall or facade expansion joint?
Installing an expansion joint between 2 concrete walls is quick and easy.
- Clear the body of the expansion joint. Surfaces must be clean and dry.
- Position the two aluminum side plates on either side of the facade expansion joint. Spacing can be adjusted with small pieces of insert.
- Drill the holes. Diameter and depth will vary according to substrate and screw type.
- Vacuum supports and holes. Insert dowels and screws.
- Position the insert roller, using a mallet and soapy water if necessary.
- Heat-weld the inserts for the connections.
- Take care to protect the wall expansion joint during the construction phase.
Waterproofing expansion joint
VED’EPDM waterproofing membrane is used to seal walls, facades and ceiling expansion joints. It is installed after the firestop solution, if required, and before the expansion joint cover. It is fixed in an omega shape on either side of the expansion joint, using our MS adhesive. To ensure a perfect seal between floor, walls and ceilings, a minimum 150mm rise is required between floor and walls, and walls and ceilings.
How to hide a ceiling expansion joint?
Ceiling expansion joints are a continuation of wall and floor expansion joints. Our expansion joint profiles provide an aesthetically pleasing finish, protect the joint so as not to affect movement, and ensure safe passage for pedestrians and vehicles on the floor. All JDV products can be installed on walls, facades and ceilings. The installation method is the same as above. Depending on the opening and expected movements, you will find the ceilng, wall and façade expansion joint perfectly suited to your configuration.
You may also be interested in this product
To ensure aesthetic continuity on the floor with our wall expansion joint, we can suggest you our JDH 5.26, available from stock too. It also includes two visible or invisible raw aluminum side plates and a heat-sealable nitrile insert.
| REFERENCES JDV 4.06 | 4.06-020 | 4.06-030 | 4.06-040 | 4.06-050 | 4.06-060 |
|---|---|---|---|---|---|
| GAP UP TO (MM) W | 20 | 30 | 40 | 50 | 60 |
| MOVEMENTS (MM) | +3 / -3 | +7 / -7 | +10 / -10 | +7 / -7 | +1-10 |
| VISIBLE WIDTH (MM) S | 140 | 150 | 160 | 180 | 190 |
| TOTAL WIDTH (MM) B | 140 | 150 | 160 | 180 | 190 |